Scar Camouflage
for White Scars
Erica Miles
Austin-based permanent makeup artist specializing in medical scar camouflage, 3D areola restoration, and powder brows. A background in TV-film and 11 years on New York sets — training under Bobbi Brown and Laura Mercier — gave her an eye for natural beauty she now brings to paramedical PMU.
Powder Brow certified · 5 Star Brows, Dallas · @ericamilesbeauty
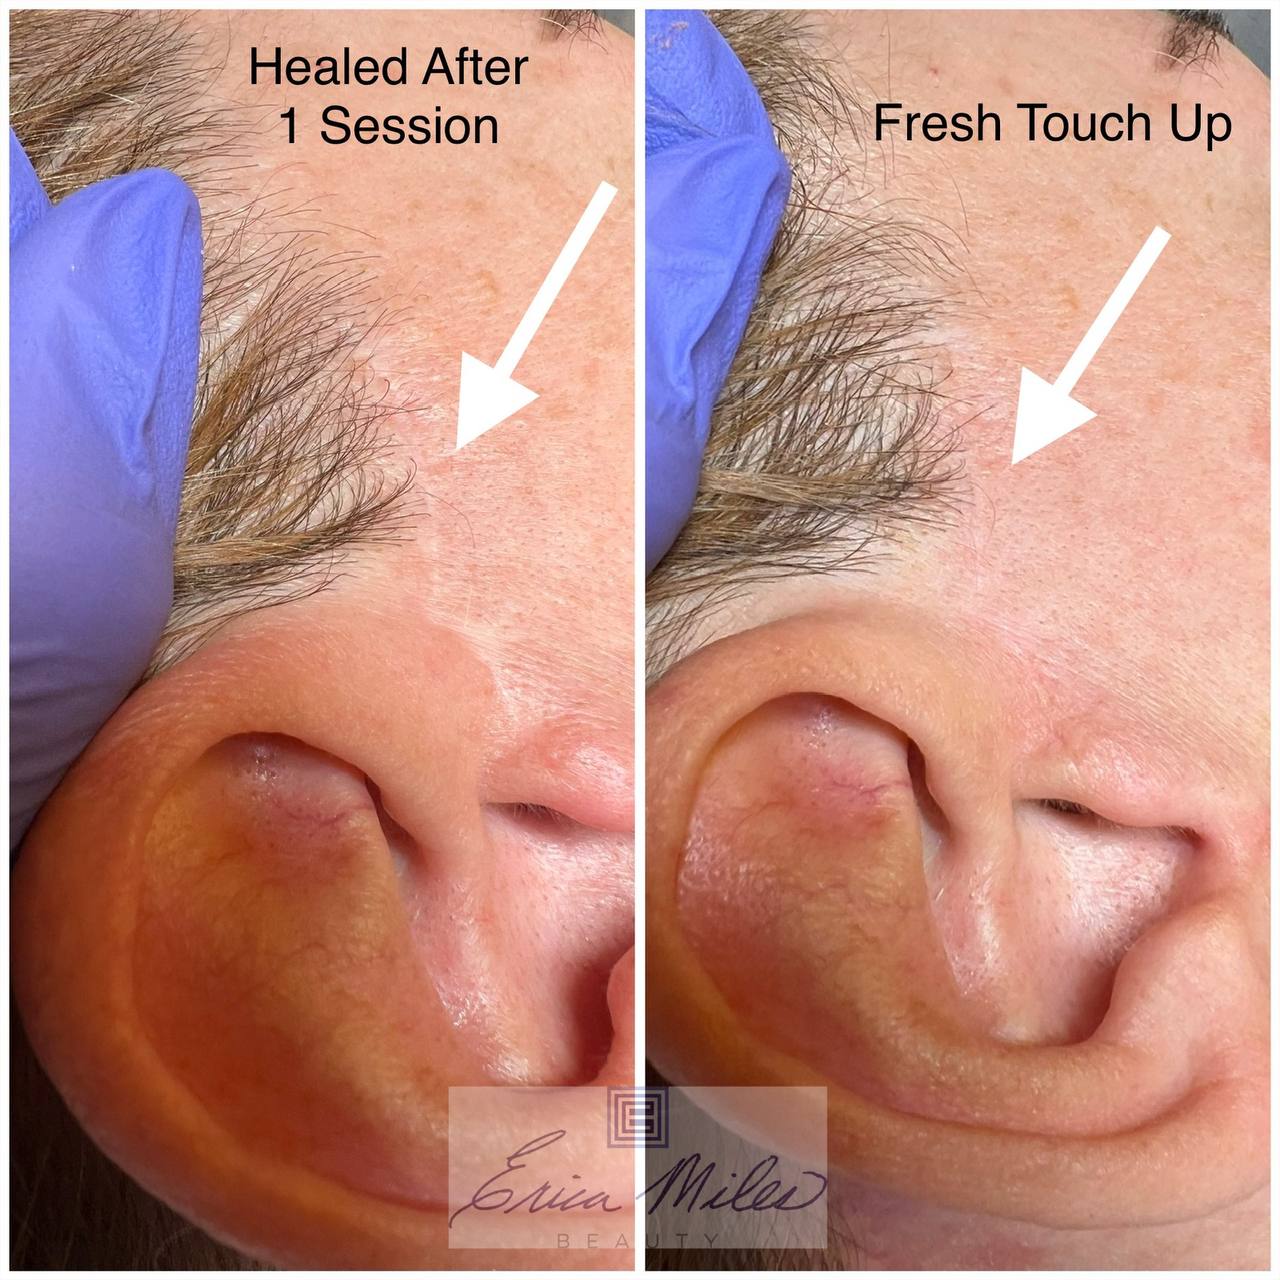
Blend the scar — don't erase it.
The purpose of scar camouflage is to make the scar less noticeable. It will never be perfect. You hope for improvement, not perfection.
Set expectations first.
- Ask if they'd be happy with only 20–30% improvement. If they say no, do not proceed.
- It takes at least 2 sessions — possibly 3–4. Touch-ups will be needed later.
- Never give an exact time for how long it lasts.
Scar tissue is changed skin.
Sometimes it resists color, sometimes it grabs it too much. Start lightly and assess how the color heals before you build.
Start clean.
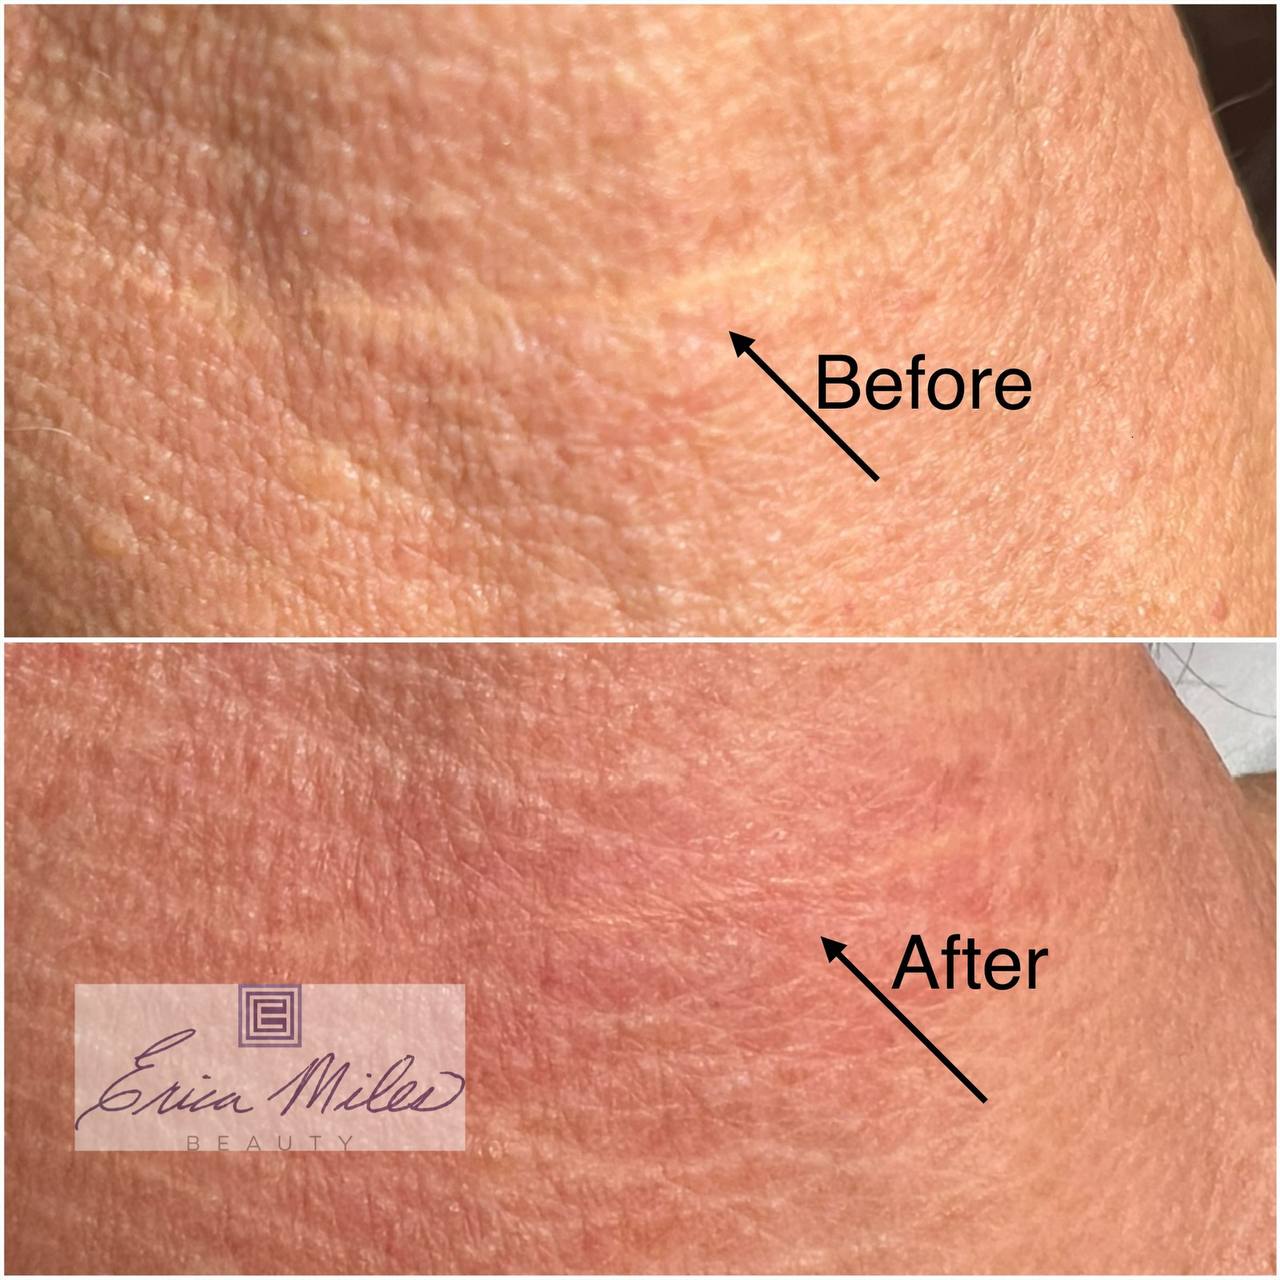
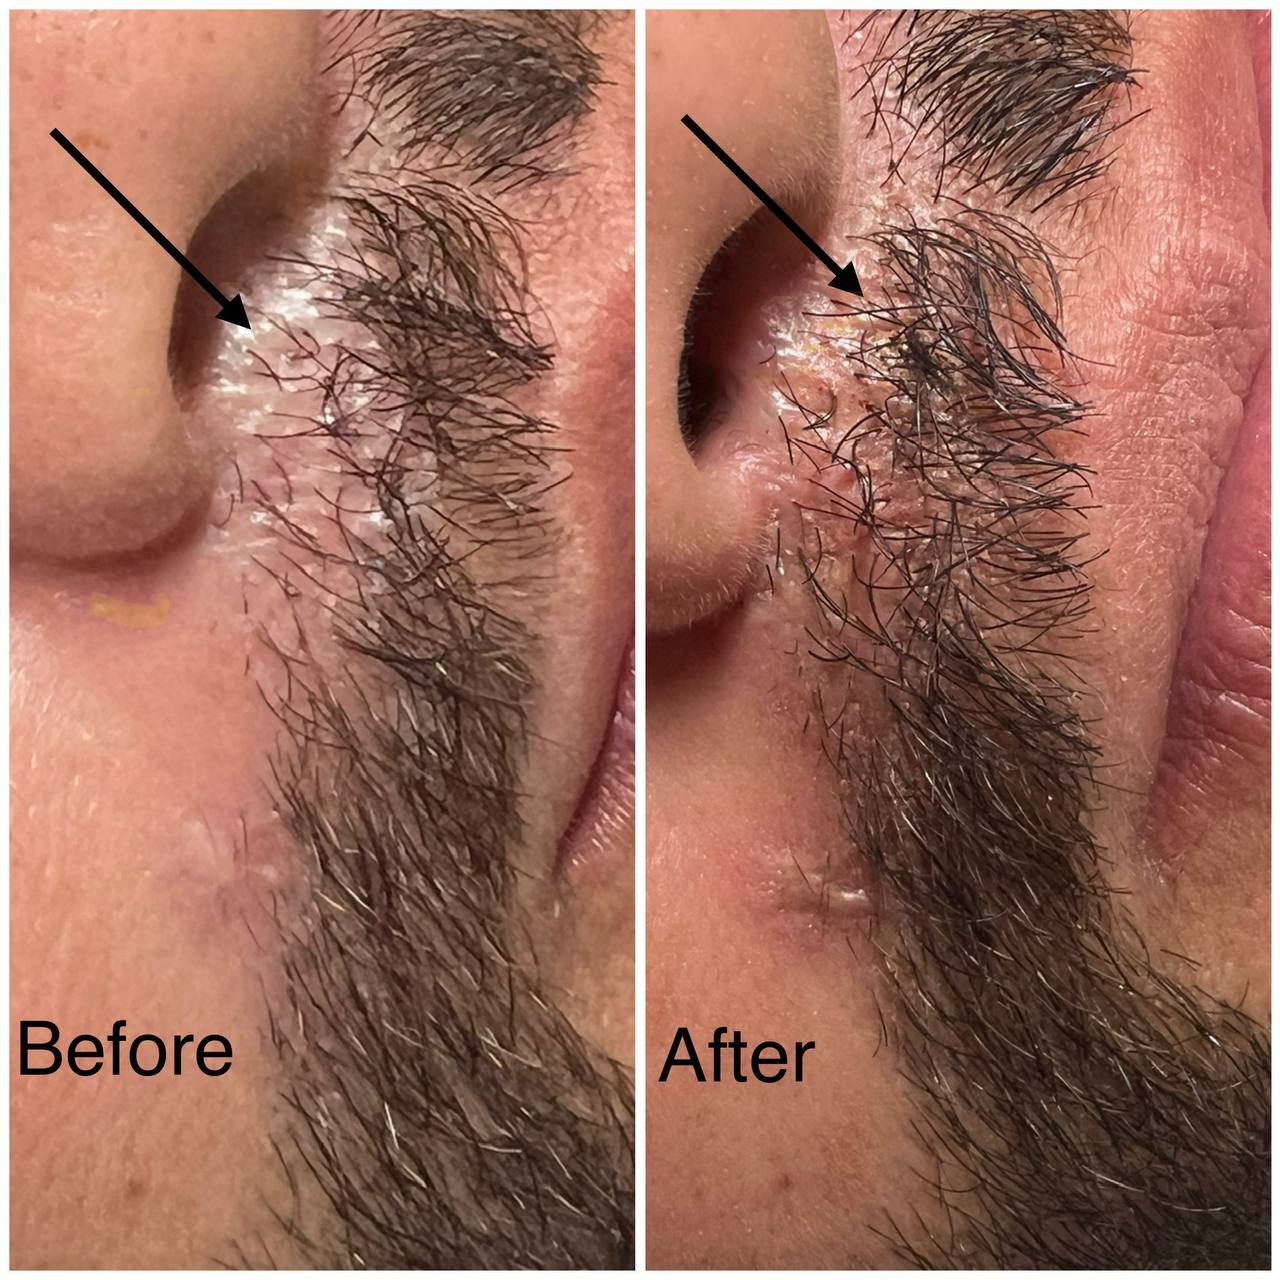
Clean the skin with alcohol. Take your "before" photos before you begin.
White, pink, or brown?
Read the scar's color first. We work on white scars only.
Match the skin's tone
Hold swatches against the skin to find the best tones to mix. Look for the undertone:
Mix & dab to test
Mix a few options and dab them on the skin. Test at least 3 colors, let them fully dry, then mark each with a pen.
Match the needle to the scar
3RLLT
Fine surgical scars — precise, controlled deposit.
5RS
Detail work and edges; gentle on delicate tissue.
13 Mag
Broad body scars — layer first, refine with the 5RS.
Two ways to lay the color
Thin scars
"Bouncing pointillism" or small circles.
Body scars
Layer the color in a cross-hatch pattern.
Circle first
Sometimes it helps to circle the scars before you start, so you can see exactly where you're working.
Go gentle
Scars go red very quickly — they're sensitive. If you see bleeding, you're being too aggressive.
Wipe gently, then finish.
- First dab and press with a damp cotton pad and water — then check your work.
- Clean with micellar water when finished.
- Take your "after" photos.
Send them home with a plan
Apply Aquaphor
A thin layer right after the session to protect the area.
Keep it moist
Reapply the ointment for the first 7 days.
No water
Do not submerge in water for 14 days.
The rules that protect you.
- Improvement, not perfection.
- Start light; assess the healing.
- Match undertones; test 3+ colors.
- Right needle for the scar; no bleeding.
- Plan for 2+ sessions and aftercare.
Thank you.
Austin, TX